The Virtual Scope is a virtual system, including microscope, stage and camera for viewing NanoZoomer NDP images. Simply load a slide and everything seems as if the slide is on an actual microscope. Users may change objectives to increase the magnification and use the virtual stage to view different areas of the slide. The Virtual Scope Setup panel and the stage controls (XYZ Setup panel) are located in the Device pane.
The Virtual Scope is added to a profile using the same steps as adding a motorized microscope.
As mentioned above, the virtual system is comprised of a microscope, stage and camera. The controls for the scope and the stage are located in the Device pane. The Virtual Scope Setup panel lets the user browse for and open NDP images and switch objectives. Depending upon the conditions the NDP image was captured under the Virtual Scope Setup and XYZ Setup panel controls will vary. The most notable difference users may notice is the variation of available objectives or the ability to change the Z postion.
Click the Open Slide button to browse and select an NDP image to open. The available objectives are displayed at the bottom of the Virtual Scope panel. To change objectives, simply click on the magnification button and the image will be updated.
The Virtual Stage controls are located in Stage Control tab of the XYZ Setup pane. The example below is a screenshot of the Stage Control tab with a brief description of the function of each control. The blue boxes pertain to X, Y controls, the light purple boxes to Z controls and the light green box for the Display Units (i.e., microns, millimeters or nanometers).
Use the sliders or the crosshair to drive the stage to different locations on the NDP image. The example below shows the direction the image travels when the sliders or crosshair is dragged in a specific direction.
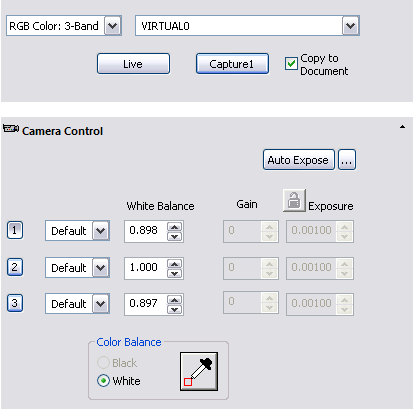
The Virtual Camera allows the user to adjust the white balance![]() Performed by referencing a white area and making simple adjustments to the RGB signals to produce a correctly balanced white., also referred to as the color balance, as well as capture images. To adjust the white balance, first locate a suitable light area of the background and then click the "eye dropper" button. Then click and drag the mouse creating a rectangular region within the light area and click OK. The image is modified and the White Balance value for each channel is updated.
Performed by referencing a white area and making simple adjustments to the RGB signals to produce a correctly balanced white., also referred to as the color balance, as well as capture images. To adjust the white balance, first locate a suitable light area of the background and then click the "eye dropper" button. Then click and drag the mouse creating a rectangular region within the light area and click OK. The image is modified and the White Balance value for each channel is updated.
