 . Use the Split Vertical icon (
 . The numbers 1 and 2 in the example images correspond to the buttons in Camera Control panel.
HCImage supports the W-VIEW GEMINI for simultaneous dual wavelength image acquisition using a single camera. The W-VIEW GEMINI uses image splitting optics to project the two wavelengths of interest (side by side) onto the sensor of a camera. This means that the effective size of the field of view is approximately half the sensor size. The W-VIEW GEMINI was designed to take advantage of the large field of view of the ORCA-Flash4.0 providing approximately 2000 x 1000 pixels for each image. An appropriate mask for a 512 x 512 pixel camera, such as the ImagEM X2 is also available. When a camera is added to a profile as a W-VIEW Camera, HCImage incorporates multi-view functionality, allowing the camera to function in a similar manor as using dual cameras. With a few exceptions, almost any Hamamatsu camera supported by HCImage can be added to a profile as a W-VIEW Camera.
HCImage added the W-VIEW mode, which incorporates a split view to accommodate the separated single wavelength images from the W-VIEW GEMINI. To enable this mode, select W-VIEW Camera when adding the camera to the profile, see "How to add a W-VIEW Camera to a Profile." The user can select between three capture modes: Mono 1 Channel, RGB Color 2-Band and Mono 2 Channel. However, because a single image sensor is used and not two independent image sensors, certain camera controls, such as exposure and gain settings are the same for both images. To select a capture mode go to the Capture panel and click on the drop-menu above the Live button. The Camera Control pane is modified based on the capture mode selected. The capture modes are explained in detail below.
Note: The W-VIEW mode allows the user to split the image horizontally or vertically based on how the images are projected onto the camera sensor (not available for the ORCA-Flash4.0 V3 and LT). The Split icons are located below the Live icon in the Capture pane. Use the Split Horizontal icon (![]() ) to create top and bottom images
) to create top and bottom images  . Use the Split Vertical icon (
![]() ) to create left and right images
) to create left and right images  . The numbers 1 and 2 in the example images correspond to the buttons in Camera Control panel.
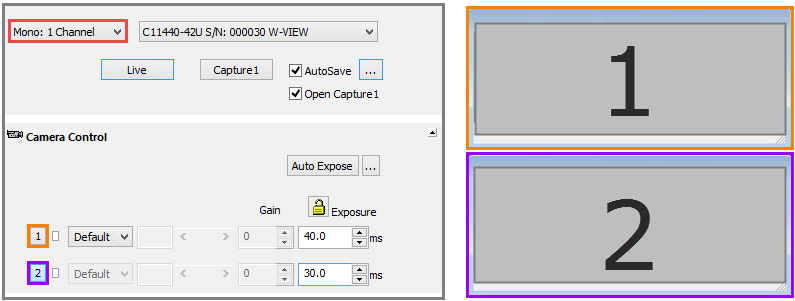
In the single channel monochrome mode, the user can select which image to display, only one image will be displayed at a time. To enable this mode, go to the Capture pane and select Mono: 1 Channel from the drop-menu. Click on the 1 or 2 button to select which image will be displayed.

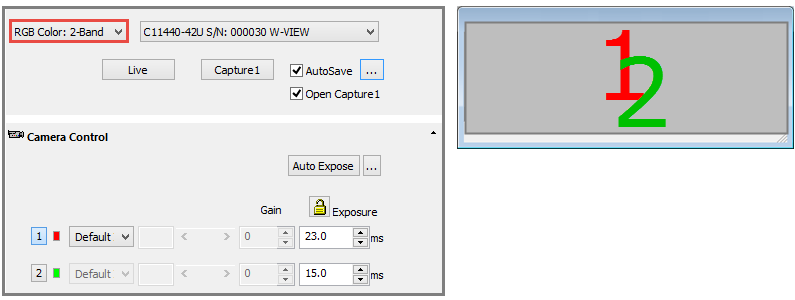
The RGB Color 2-Band mode displays a merged red-green image from image 1 and 2. To enable this mode, go to the Capture pane and select RGB Color: 2-Band from the drop-menu.
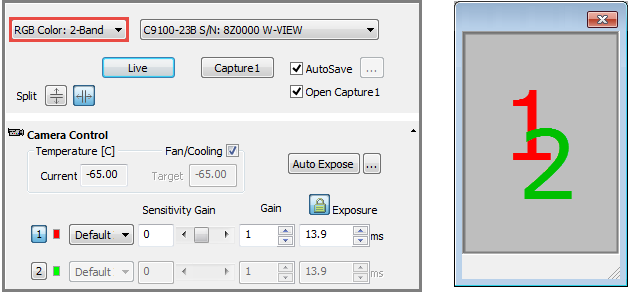
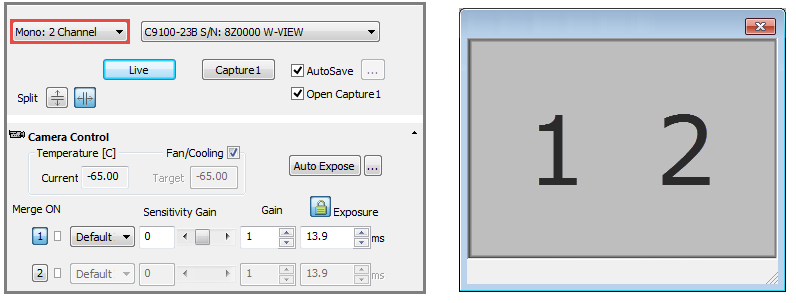
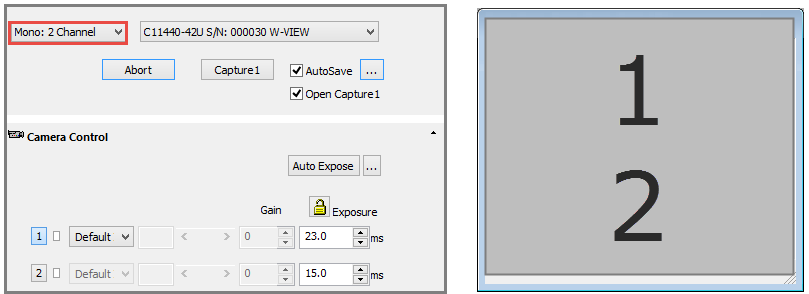
In the two channel monochrome mode, images 1 and 2 are displayed side-by-side (i.e., the whole camera sensor is displayed). To enable this mode, go to the Capture pane and select Mono: 2 Channel from the drop-menu.
The ORCA-Flash4.0 V3 and LT include additional functionality in the W-VIEW mode that is not available with other cameras. In W-View mode, the horizontal split view allows for independent exposure time settings and independent readout directions for the upper and lower halves of the sensor, as well as separate position offsets for subarray. Vertical split view is not available with the ORCA-Flash4.0 V3 and LT. W-VIEW capture modes include: Mono 1 Channel, RGB Color 2-Band and Mono 2 Channel. To select a capture mode go to the Capture panel and click on the drop-menu above the Live button. The Camera Control pane is modified based on the capture mode selected. The capture modes are explained in detail below.
Note: Separate subarray mode allows the user to define a separate position for the top and bottom halves of the sensor. The dimensions for each array must be the same but the positions can vary within each half of the sensor. Using separate subarrays can increase acquisition speed and reduce data volume. By default, the subarray positions or "View Offsets" are synchronized. Disable Sync View Offsets in the Binning and SubArray panel to allow independent position adjustments for the top (View 1) and bottom (View 2) halves of the sensor.
Note: Independent readout controls allow the user to select the readout direction, Forward or Backward, for the upper and lower halves of the sensor. The controls are located under DCAM Properties in the Advanced Camera Properties panel.
In the single channel monochrome mode, the user can select which image to display, only one image will be displayed at a time. To enable this mode, go to the Capture pane and select Mono: 1 Channel from the drop-menu. Click on the 1 or 2 button to select which image will be displayed.
The RGB Color 2-Band mode displays a merged red-green image from image 1 and 2. To enable this mode, go to the Capture pane and select RGB Color: 2-Band from the drop-menu.
In the two channel monochrome mode, both images 1 and 2 are displayed (i.e., the whole camera sensor is displayed). To enable this mode, go to the Capture pane and select Mono: 2 Channel from the drop-menu.
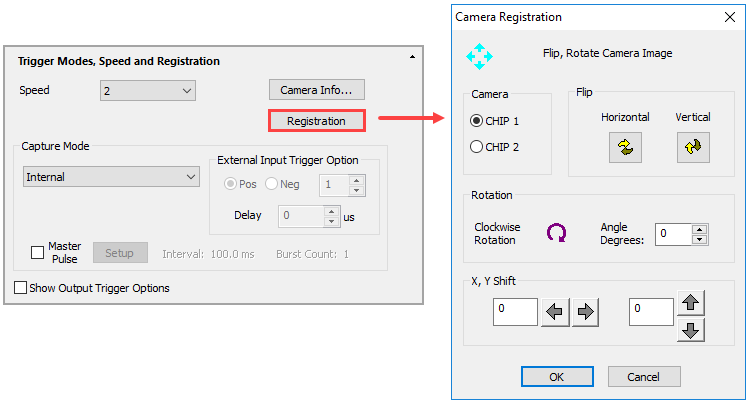
The Camera Registration feature allows the users while Live to flip and rotate the image. Click on the Registration button in the Trigger Modes, Speed and Registration pane to open the Camera Registration dialog.
