HCImage Montage provides users with an automated and manual solution for stitching large image data sets. Instructions for using the automated and manual stitching are covered in this topic, as well as how to setup an XYZ scan for optimal stitching.
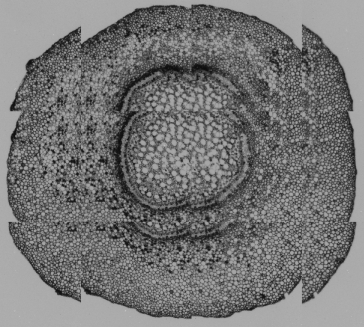
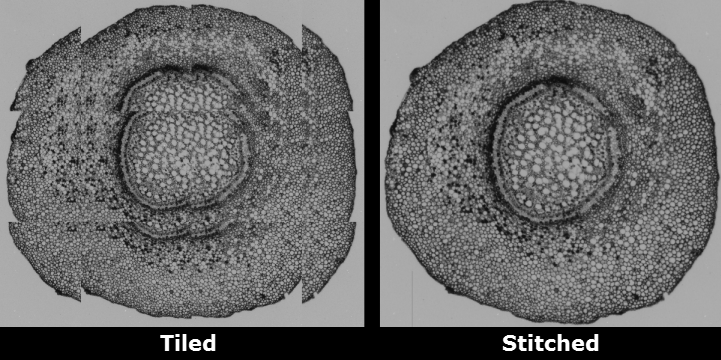
First, lets start with the montage. Once the data set has been acquired, select Field Image Montage in the data tree of the data document to create the montage. The montage is created automatically based on the XY acquisition coordinates. At this point, the montage is tiled images that have not been stitched, if the data set was acquired with the appropriate offset, you will see the corresponding overlap in the X and Y directions on the individual images as shown in the image on the right.
Now the user has the option to perform an auto-stitch or to manually stitch the images. Before we look at each stitching method, let's take a look at how to setup an XYZ scan to get the best end result.

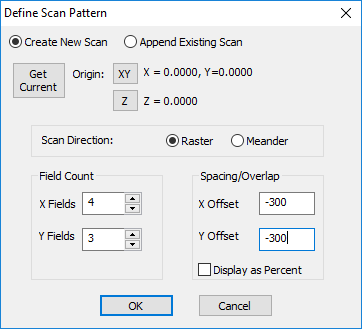
For the best stitching results, there should be a 10-25% overlap between images in both the X and Y directions. An easy way to ensure that there is image overlap, is by setting an X and Y offset using Define Scan located in the XYZ Scan Setup panel of the Sequence pane.
Prior to setting up an XYZ scan, it is very important that the stage has been calibrated and that the appropriate scale factor has been selected for the objective. Failure to do so could cause damage to the hardware and/or sample. For more information, see "Calibrate the Stage."

Keep in mind that when using an offset of 10-25%, the total length and width of scan may need to be adjusted by adding additional fields in both the X and Y. The units for the offset are based on the units of the current scale factor. The image dimensions are listed as Width and Height, in the Binning and SubArray panel of the Capture pane.
The ORCA-Flash4.0 chip size is 2048 x 2048 pixels, with a pixel size 6.5 microns. At 10x, the scale factor is 0.571 microns per pixel, for more information, see "How to Calibrate an Image from Pixels to Microns." To calculate a 15% overlap use the following equations:
X Offset (2048 x 0.15)(0.571) = 175.4; Y Offset (2048 x 0.15)(0.571) = 175.4
The auto-stitch method is referred to as Stitch or Full Stitch in HCImage. Follow the instructions below to perform an auto-stitch.

Manual Stitch, referred to as Hints Stitch, lets the user manually align the images and then apply a stitching algorithm using their adjustments. This may be the preferred method when the nature of the pattern in the images or the degree of overlap is not suited for auto-stitching. To manual stitch, control-click on an image in a tiled montage. The image will now be shaded gray. This is the pivot point. The images below and to the right of the pivot points are shaded dark gray. It is possible to move these darkly shaded images. Once the manual stitching has been applied, select Hints Stitch from the montage properties. The overlaps created by moving the tiles manually, will be used as hints in the auto-stitching algorithm.
